From cherry blossom pink to snowflake white: How to use a nail drill to create haute couture nails for all seasons

your nail drill solely as a quick gel remover? If so, you’re missing out on its true potential. I used it for rough removal until my instructor taught me that a nail drill is actually a “micro-carving knife” for achieving intricate nail art. Mastered correctly, it can become your magic wand for all seasons, letting you say goodbye to the salon and create professional-grade, seasonal looks at home.
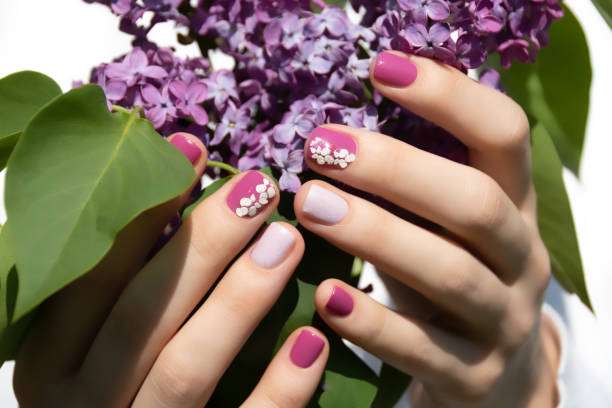
Spring revival: light base and gentle polishing of 3D flowers
Spring is a time of renewal, lightness, and translucence, and nail art designs tend to be soft and natural. Our goal is to prepare the nails seamlessly and refine the three-dimensional shapes that are popular in spring.
Prepare the base for the “new sprout” non-invasively. Spring manicures strive for lightness and transparency. Any remaining glue will make the new color appear thick.
Say goodbye to the rough feel of traditional files and use an ultra-fine grit or soft silicone tip. Reduce your nail drill speed to a very low setting, like a feather brush, to gently remove any remaining oil and glue residue from the nail surface.
I once tried to create clear jelly nails myself, but I didn’t sand the base thoroughly, resulting in an “orange peel” texture on the gel. Using a low-speed drill to evenly polish the nails immediately improved the results. The advantage of a power drill is that it ensures a consistent finish, which is difficult to achieve with hand tools.
Spring manicures often feature 3D floral sculptures or water droplets. These 3D shapes often have sharp edges after curing.
Use a small diamond-tipped drill bit to round off the edges of the cured 3D gel flower. This will remove any sharpness and make the petals look more natural and “bud-like” rather than a hard piece of plastic.
Summer Passion: A Quick Guide to Efficient Color Changes and Beach Textures
Summer means beaches, pools, and vibrant colors. Nail polishes are changing colors more often, and hard-to-remove elements like sequins and shells are also becoming more common.
In response to the efficient uninstallation of fast fashion nail art , no one wants to waste precious summer time wrapping tin foil and waiting for nail polish remover.
Upgrade your technique: For thick summer glitter gel or multiple layers of color, switch to a ceramic corn or tungsten carbide abrasive. Use a medium-to-high speed to quickly remove the top layer of gel over a large area.
To create a realistic beach wave texture , use an ultra-fine cylindrical grinding tip on uncured modeling glue and gently sweep it over the glue with very light pressure and medium-to-low speed. This will create subtle textures and scratches on the glue surface, making your nails look like they are being blown by the sea breeze and full of dynamic feeling.
Autumnal Calm: Precise Binding and the Cashmere Feel of Sweater Armor
Autumn is the season for refinement and detail, and the popular French manicure, geometric color blocks or warm “sweater nails” all require extremely high border precision.
Pixel-level trimming of geometric color blocks. Dark-colored nail art such as wine red and dark green in late autumn will look very cheap once the edges are blurred.
Use a safety round-point drill bit or a tapered drill bit at medium-low speed to refine along the edge of a French trim or color block. A nail drill can help you achieve perfectly straight and curved lines like a knife, which is difficult to achieve with a manual brush.
Give the “sweater armor” a warm cashmere texture . If the edges of the sweater armor are too hard, it will look like a plastic toy.
After carving the wool pattern with gel and letting it cure, use a soft silicone polishing tip (at low speed) to gently and quickly polish around the carved pattern. This step softens the sharp edges of the pattern and creates the warmth and volume of the sweater fibers.

Winter Fantasy: Unloading the deep maintenance of thick nails and finger edges
Winter often means thicker extensions (like acrylics or hard gels) and longer-lasting manicures, so the focus is on efficient removal and meticulous cuticle care.
Quickly remove thick winter nail defense. Manual removal of heavy crystals or extensions is very time-consuming and can easily damage the nail bed.
Upgrade your technique: Use a hardened tungsten carbide “corn head” drill bit (coarse grain). Push the drill bit to a high speed (>25,000 RPM) and employ a steady, moving motion to quickly unload large areas. High RPM allows the drill to cut more efficiently and avoids the burning sensation caused by dwelling in one spot.
Maintaining the cleanliness of long-lasting manicures Since winter manicures last for a long time (possibly more than 4 weeks), the newly grown dead skin on the nail edges will be very obvious.
Use a flame-tipped or bullet-tipped ceramic drill bit at a low speed (<10,000 RPM) for professional, non-invasive exfoliation. Thoroughly clean the nail area and nail fold, ensuring the new nail area is clean. This not only helps your manicure last longer but also prepares the nail for a perfect base coat application next time.
Summarize:
If you only use it to remove old glue, it’s like using your iPhone only to make calls, what a waste! Now, it’s time to explore how much creativity and convenience your nail drill can bring you. Do you also want to own a nail drill?
Which season’s nail art look are you most excited to try using the techniques you learned today? Share your next manicure plan in the comments below!