
The nail drill has undoubtedly revolutionized the modern nail art world. It makes nail removal and shaping quick and efficient. However, if you’re struggling with wrist pain and forearm stiffness, the problem may lie not with your tools but with your operating habits and ergonomics.
When I first started, my mentor told me, “Hold it like a pencil.” But it turned out that simple instruction was the root cause of chronic fatigue. Just two years in, I began experiencing excruciating, stabbing pain in my wrists after prolonged operation, which nearly threatened my career.
Correct gripping posture must be based on biomechanics, transferring power from the fragile wrist to the strong arm. This article shares my five years of professional experience and provides an in-depth analysis of how to achieve maximum stability and durability through fine-tuning your posture and operating habits, so your wrist no longer pays the price for incorrect posture.

The Basics of Grip: Say Goodbye to Stiffness and Fatigue
An incorrect grip over-relies on the small muscle groups in the hand, causing muscle fatigue to accumulate quickly. The key to professional posture is relaxation and power transfer.
Relaxed embrace principle: the subtle distance between thumb and index finger
The traditional “tight grip” will quickly cause joint tension and fatigue under the high-speed vibration of the electric drill.
I’ve found that as soon as I start to grip the drill pen tightly, my forearm immediately tenses up. The correct position is for the thumb and index finger to form an open and relaxed “O” shape, gently hugging the upper middle section of the pen. This allows the arm to be the primary force directing the force, rather than the wrist having to “fight” the vibration.
Avoid: Never allow the tips of your thumb and index finger to touch tightly together, as this will only add unnecessary excessive force.
Wrist and forearm: Use gravity to maintain a neutral position
The key to preventing wrist fatigue is to keep your wrist in a neutral position as much as possible and in line with your forearm.
The trap of incorrect posture: Relying solely on twisting the wrist to adjust the drill bit angle forces the wrist into an unnatural high-pressure position.
Correct posture: When adjusting the drill bit angle, the forearm and even the shoulder should be used as the axis for the entire movement. The arm handles the broad push and pull movements, while the wrist is responsible for fine-tuning, acting as a stable connector. This effectively distributes the force to the larger muscle groups that can withstand more strain.
The Golden Rule of Stability: Support Point and Angle Control
To ensure the stability of the nail drill and the precision of the nail surface, you must provide a reliable physical support for your operating hand.
Find your anchor point: The pinky support is your safety belt
No matter what area you operate in, you need an anchor point to offset vibrations and operating errors.
Pinky Support: This is the industry gold standard. My teacher emphasized that your pinky or ring finger must be firmly supported on the customer’s hand or the table like a car’s **seat belt**.
Key Points: This support point must be dynamic, moving as your operating position changes. It effectively prevents the electric drill from “jumping” onto the customer’s skin due to hand shaking or accidental slippage, which is the ultimate guarantee of stability.
Safety and efficiency: Control of the optimal operating angle
The angle between the drill bit and the nail surface directly determines the efficiency of the operation and the health of the nail.
Side shaping: The drill bit should be close to flat against the nail surface (0 to 5 degrees). This is to effectively trim the side wall and avoid leaving dents on the nail surface.
Nail Edge Care: Raise the drill bit slightly to a 10-15 degree angle, like a gentle “broom.” Never dig vertically or at a high angle to the nail edge, as this is the main cause of nail damage and heat.
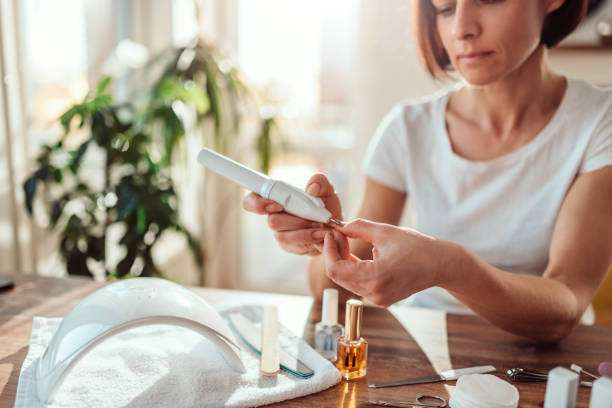
Improve operating efficiency: tacit cooperation between the gripping hand and the auxiliary hand
Correct posture is also a process optimization that can significantly improve your work efficiency.
Dynamic adjustment of grip and relaxation pause
A professional grip is not rigid, but needs to be dynamically adjusted according to the drill bit and operating area.
My work habits: After each nail, I now take a brief, five-second pause to relax. I flick my wrist and take a deep breath. This may seem like a waste of time, but it significantly delays muscle fatigue and allows me to work longer.
Effective coordination of the assisting hand: stretching and fixation
the nail drill belongs to your auxiliary hand (non-operating hand).
Stretching the skin is key: The assistant hand should gently stretch the skin around the patient’s fingertips in the opposite direction of the operating hand. This not only flattens the working area, greatly improving efficiency, but also prevents the drill bit from getting entangled in loose skin.
Gentle grip: The assistant hand should firmly but gently hold the customer’s finger, especially if the finger is wobbling. This provides a stable working environment for the operator, allowing you to perform delicate work with greater confidence.
In conclusion:
I almost gave up the job I loved because of poor posture. Now, I want you to start examining your grip: relax your thumb and index finger, find your pinky anchor point, and let your arm, not your wrist, control the power.
Remember: a more stable grip means less fatigue, higher efficiency, and fewer risks to your manicure.
When was the last time you intentionally corrected your grip? Where is your pinky anchor point?