
One of the most frustrating things about using a nail drill at home or in a salon is when it suddenly won’t turn on. You’re planning to buff your nails or apply extension gel, but pressing the switch does nothing. Don’t panic! This article will teach you how to systematically troubleshoot common causes of ” nail drill not turning on” and provide corresponding solutions, helping you find the root cause of the problem in minutes and get your device working again.
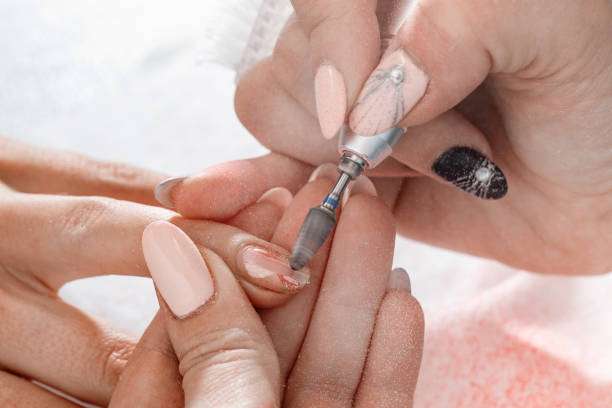
Why does nail drill fail to power on?
The nail drill is small in size; it has a sophisticated internal structure, including multiple components such as the main unit, power supply, switch, motor handle, and signal cable.
The inability to power on a computer usually stems from the following reasons:
Power is not connected (loose socket or incorrect voltage).
Power adapter or transformer damaged
Internal switch malfunction in main unit
Handle cable broken or poor contact
Internal fuse blown or motherboard malfunction
To conduct a proper investigation, one should start with the simplest and safest external issues and gradually transition to internal testing.
Step 1: Confirm that the power supply is normal.
The most easily overlooked component is the power supply itself. Many cases of ” nail drills failing to power on” are not actually due to a broken machine, but rather a problem with the external power supply.
Inspection method:
Is the plug fully inserted?
Sometimes the plug is not fully inserted into the socket, so it may appear to be plugged in, but there is actually no power.
Is the socket powered?
You can plug in a hair dryer, light fixture, etc., to confirm that the socket is supplying power normally.
Avoid using extension cords or old power strips.
Some low-quality extension cords have poor contact, which can cause power interruptions.
Confirm that the voltage is compatible.
Nail drills purchased overseas may be designed for 110V; plugging them directly into a 220V socket can easily damage them.
Recommendation: Use a power strip with an indicator light or a test pen to quickly determine if current is flowing through it.
Step 2: Check the power adapter and connecting cable
Nail drills typically come with a power adapter (transformer). This is one of the components most prone to aging or burning out.
Key points for inspection:
Observe whether the adapter indicator light is on.
If it is not on, it means there is no output voltage.
Is the adapter overheating, making unusual noises, or emitting an unusual odor?
If any of these symptoms occur, please stop using it immediately.
Use a multimeter to measure the output voltage.
Check that it matches the nominal value (e.g., 12V or 24V).
Try replacing the power cord.
If the main unit is removable, try replacing it with a compatible adapter to see if the problem is resolved.
Note: Non-original adapters may output excessively high or unstable voltages, which may cause the circuit to burn out.
Step 3: Test the power switch of the host unit
Although the power button on the nail drill unit is simple, it is the key to the “start command”.
Detection method:
Press the power button lightly to see if there is a “click” sound.
If there is no tactile feedback or sound, the internal components may be stuck or oxidized.
Observe the power indicator light on the computer.
If it is not lit, the problem may be with the power switch or the motherboard power supply.
Gently shake or toggle the switch multiple times.
Sometimes the internal contacts may be loose; repeated toggling may temporarily restore contact.
Does the casing have any unusual odor or bulges?
If there is a burning smell or bulges, it indicates that the internal circuitry may be short-circuited, and the power should be turned off immediately.
Step 4: Check the handle and signal cable
Even if the main unit is working properly, damage to the handle may prevent the nail drill from starting.
Key points for inspection:
Ensure the handle connector is fully inserted.
On some models, the connector is tight; incomplete insertion may cause a circuit break.
Check if the cable is twisted or bent.
If the cable is repeatedly bent, the internal copper wires are prone to breakage.
Test the main unit by unplugging the controller.
If the main unit lights up normally after unplugging, the problem lies with the controller or the signal cable.
Try a spare controller.
Professional salons usually have multiple controllers on hand, and you can cross-test compatible models.
Tip: It is recommended to clean the interface regularly to remove dust and nail polish to prevent oxidation of the metal contact points.
Step 5: Check the fuse and internal circuitry
If all the above steps are successful, the problem may be caused by internal component damage.
Common internal faults include:
The fuse blew
The motherboard capacitor exploded
Motor short circuit
Poor contact of speed control knob
If you have electrical repair knowledge, you can open the back cover to check if the fuse is blown. If it is blackened or blank, it is blown.
After replacing it with a fuse of the same specification, test again to see if the power is restored.
If the machine still does not respond, it is recommended to stop trying to disassemble or repair it yourself and contact after-sales service or a professional repair shop to avoid causing more serious damage.

Prevention Recommendations: How to prevent nail drill from failing to power on again
Avoid prolonged continuous use (it is recommended to use it for about 30 minutes each time).
Use a voltage regulator or surge protector to prevent voltage fluctuations from burning out the power supply.
Clean the main unit and handle regularly to prevent dust from entering the circuitry.
Store in a dry environment to prevent moisture from corroding the motherboard.
Purchase genuine accessories from reputable brands, such as adapters and handles.
Frequently Asked Questions (FAQ)
Q1: The nail drill light comes on after powering on, but the handle doesn’t turn?
A: This may be due to a faulty internal motor or a loose wire in the handle; try replacing it with a spare handle for testing.
Q2: The main unit can be turned on but the sound is abnormal or the vibration is unstable?
A: This is usually caused by bearing wear or motor imbalance. The motor can be sent for repair or replacement.
Q3: The computer still won’t turn on after replacing the power adapter?
A: It may be that the motherboard power module is damaged and needs to be repaired by a professional.
Q4: My new console won’t turn on right after I bought it?
A: Some models have a safety switch. You need to check if the “handle lock mode” is off.
Conclusion
If your nail drill fails to power on, don’t panic. Start with a simple power check, then gradually troubleshoot the adapter, main unit, handle, and other components. Most problems can be quickly resolved through system-wide fault detection.
Thinking of getting a new nail drill? Check out our selection of nail drill for a better nail art experience!