
Nail drills are an efficient tool for modern nail technicians, but improper use can lead to nail damage and equipment failure. It’s emphasized that beginners often make mistakes due to a lack of knowledge, thus affecting the lifespan of the electric nail drill.
This article will reveal 10 common mistakes in using nail drills and provide corrective methods for professional operation.

Myth 1: Using excessive force during operation
Incorrect behavior: Applying excessive pressure to the nail surface, using a nail drill like a traditional hand file.
Consequences: Can cause heat burns, thinning of nails, and even damage to the nail bed. Your grill will heat up faster as a result.
Professional correction: Employing a gentle “feather touch” technique; allowing the speed and torque of a professional nail drill to complete the work precisely, rather than brute force.
Myth 2: Improper RPM setting
Incorrect behavior: Using too low an RPM when removing glue or using too high an RPM when reshaping, without adjusting according to the power of the.
Consequences: Too slow an RPM can cause pulling or vibration; too fast can cause excessive friction and heat, especially when using a high-speed nail drill.
Professional correction: Master the “golden speed range”: use medium to high speed (20K-25K) for removing adhesive and low speed (5K-10K) for cleaning dead skin. Use the tachometer on your nail drill correctly.
Myth 3: Using a drill to stay in the same area for a long time.
Incorrect behavior: Repeatedly filing a small area of the nail for more than 1-2 seconds. This is a common mistake made by beginners.
Consequences: Heat accumulates rapidly in the local area, causing the client to feel severe burning pain and damaging the nail structure.
Professional correction: Maintain continuous movement of the nail drill bit, using a sweeping or C-shaped uniform path to avoid “pitting.”
Myth 4: Ignoring the forward and reverse functions of nail drill
Incorrect behavior: Using only one rotation direction regardless of which side of the nail is being treated wastes the versatility of the nail drill.
Consequences: This can lead to awkward operation, uneven polishing, or incorrect dust direction, affecting the efficiency of the nail polishing machine.
Professional correction: Use forward rotation when working on the right side of the nail and reverse rotation when working on the left side, ensuring that the nail drill bit is always pointing towards the fingertip.
Myth 5: Incorrect angle during operation: perpendicular to the nail surface
Incorrect behavior: Pointing the drill bit vertically or too much at the nail, especially when cleaning around the nail.
Consequences: Hollowing out the nail or creating grooves, especially in the nail bed area. This is the main cause of damage from.
Professional correction: Always keep the drill bit parallel to or slightly tilted (0-10 degrees) to the nail surface to achieve smooth filing.
Myth 6: Reusing unsterilized bits
Incorrect behavior: Cleaning with a brush between two clients without professional disinfection is a serious neglect of the hygiene of the nail drill.
Consequences: The risk of cross-infection is extremely high (fungi, bacteria).
Professional correction: Strictly follow the three-step method of “cleaning -> disinfection -> storage,” which is the basic principle for using any.
Myth 7: Using dulled or worn nail drill bits
Incorrect behavior: Overusing the same worn drill bit to save costs reduces the performance of the nail drill.
Consequences: Efficiency drops sharply, requiring greater pressure, and heat generation increases.
Professional correction: Regularly check drill bits, especially the particle size of ceramic and tungsten carbide drill bits, and replace them with new nail drill accessories in a timely manner.
Myth 8: The nail drill chuck is loose, or the drill bit is not fully inserted.
Incorrect behavior: The drill bit is not fully engaged in the handle chuck, causing the polishing pen to be unstable.
Consequences: During operation, the drill bit may vibrate or shake (due to poor concentricity), potentially causing it to fly out suddenly or damaging the handle bearing.
Professional correction: After each drill bit change, the handle must be locked, and the drill bit must be securely locked in the handle of the nail drill.
Myth 9: Using the same drill bit to process different materials
Incorrect behavior: Using a coarse-textured bit to clean cuticles or trim natural nails confuses the function of a nail drill bit.
Consequences: Excessive damage to natural nails and insufficient removal of dead skin.
Specialized calibration: Prepare specialized drill bits for each task (e.g., fine-grained ceramic for adhesive removal, jade hand drill bits for dead skin). Make full use of the specialization of accessories.
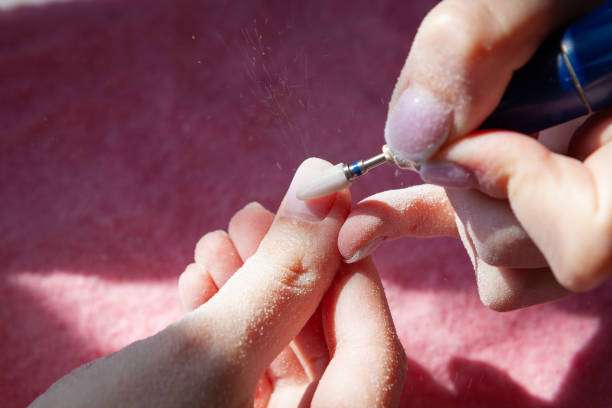
Myth 10: Neglecting routine cleaning and maintenance of the nail drill
Incorrect behavior: Allowing dust to accumulate on the nail drill handle vents or control box, affecting the heat dissipation.
Consequences: This can lead to overheating of the equipment, shortened motor life, or even permanent damage.
Professional correction: Cleaning the vents daily and performing regular deep maintenance and bearing checks are key to extending the lifespan of the .
Summarize:
Only by mastering the correct operation of a nail drill can you provide professional service. Integrating safety and correct methods into daily operations will allow you to fully utilize the superior performance of your .
Ready to upgrade your toolbox? If you find yourself frequently making these mistakes, it might be time to upgrade yours and invest in a professional nail drill with more precise RPM control and lower vibration.