
When I first picked up a nail drill , my first reaction was one of sheer terror. The sharp buzzing sound and spinning little drill bit—which felt more like a dentist’s drill than a cosmetic tool—instantly triggered a fear of being “drilled” or suffering a painful friction burn.
This anxiety is common among DIY manicure enthusiasts. However, a nail drill is an essential tool for efficient, salon-quality manicures—it makes everything from polish removal to cuticle care cleaner and faster.
Overcoming this fear doesn’t require courage; it requires knowledge, the right beginner gear, and a systematic approach to safety training. This guide offers the ultimate five-step process to master the nail drill with confidence and safety .
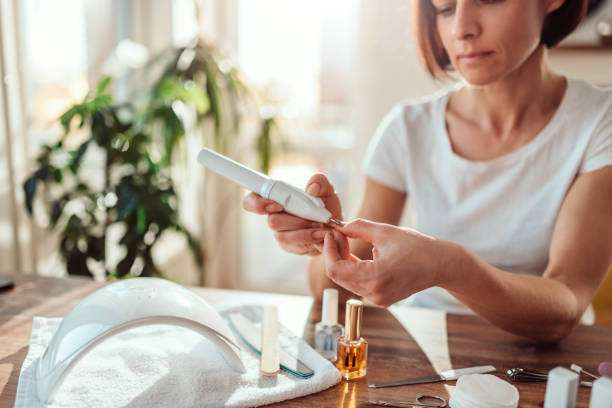
Mindset shift: This is a polisher, not a drill
A major cause of anxiety is misjudging the tool’s power and purpose. Think of it as a precision sander, not a piece of construction equipment.
Speed control is your safety net
Beginner’s Speed Rule: Most nail drills have speeds up to 8000 rpm. As a beginner, don’t start at high speeds.
Gel Removal or Contouring: Start on a low speed, around 8000 RPM or the lowest setting you are comfortable with.
Cuticle/Dead Skin Treatment: Lower it even further, to 2,000 RPM or less.
Mental Anchor: The speed dial is your panic button. Operating at low speed gives you complete control. Slight friction will only cause minor vibration or heating, not serious injury. Always start at the bottom and move slowly upward.
Material: The choice of your soft-touch carriage drill bit is crucial for safety.
Drill bits to avoid (for now): When working near the skin, avoid highly corrosive and abrasive drill bits, such as tungsten carbide drill bits.
Safety first: Choose ceramic drill bits (which generate less heat), or rubber or silicone drill bits that are better for cuticle care. These materials are gentler on the nail and skin, significantly reducing the risk of damage or heat.
Building Confidence: Mastering False Nails
Before you start using your own hand, you need to develop stability and get used to the vibrations of the drill. I used to be afraid of hurting myself with a nail drill, so I started by training with a prosthetic hand to help me get the hang of it.
Fulcrum technology for stability
Practice Surface: Use a nail practice sheet, an old layer of curing gel, or a fake practice hand.
Hold and secure: Hold the electronic file like a pen. The secret is to create a “fulcrum” (or pivot point): lightly rest your pinky or ring finger on the table, or on a practice fingernail/hand near your work area. This secure point absorbs natural hand tremors, ensuring your drill moves with surgical precision.
nail drill operation is light, continuous movement.
A feather-light touch: The pressure you apply should be very light. If you have to use force, then your speed is too low or your drill bit is too dull.
Never pause: The leading cause of worrying friction burns and nail dents is the drill bit being stopped in one spot. The drill bit should move like a paintbrush, gliding across the nail plate in a single, steady direction (for example, from left to right). Never pause for more than one second.
Advanced Safety: Your Skin’s Protective Shield
The most concerning thing is that the delicate skin around the cuticle can be damaged. Learn how to protect yourself with your hands.
Skin stretching exercises
When working on the nail epithelium (cuticle area) or sidewalls, use the thumb of your non-drilling hand to gently pull the skin back and away from the drill bit. This smooths out the dead skin that needs to be removed and pulls the living skin out of the path of the drill bit, greatly improving safety.
Master the angle
The angle of the drill bit varies depending on the job:
To shape or remove larger parts of the nail: Hold the drill bit flush with the surface of the nail (0 degrees or 180 degrees).
Cuticle Care: Keep the epilator at an angle less than 45 degrees to the skin. Use the side of the epilator (not the tip) to gently slide across the skin surface.
Sensory overload: Reduced sensitivity to sound and vibration
The buzzing sound and subtle vibrations are often more frightening than the risk of injury.
“Trial Run” Desensitization: Turn on the drill and let it run, turning the speed from low to high, holding it in your hand and away from your nails. This is your “exposure therapy”—allowing your ears and hands to adapt to the sensory feedback.
Wear safety glasses: While not absolutely necessary for many tasks, wearing safety glasses when removing gel (which creates dust) can provide a psychological boost, offering a sense of “professional safety gear” that enhances focus and confidence.
Gear Check: Choosing the Right Nail Drill for Beginners
To minimize anxiety, invest in a stable, reliable machine with good accessories.
| feature | Recommended configuration | Confidence boost |
| Host performance | Features an easy-to-use variable speed control dial and forward/reverse (F/R) switch. | Ensures you can precisely lock into a safe, slow beginner rpm and operate it comfortably with both hands. |
| Drill bit kit | A ceramic or diamond barrel drill bit (for removal) and a silicone/rubber drill bit (for cuticles) must be included. | Allowing you to start with the softer parts to build muscle memory before gradually transitioning to the harder materials. |
| Ergonomics | The phone should be thin, light and have minimal vibration. | Reduces hand fatigue and improves stability, making the tool feel less intimidating and more like a simple pen. |
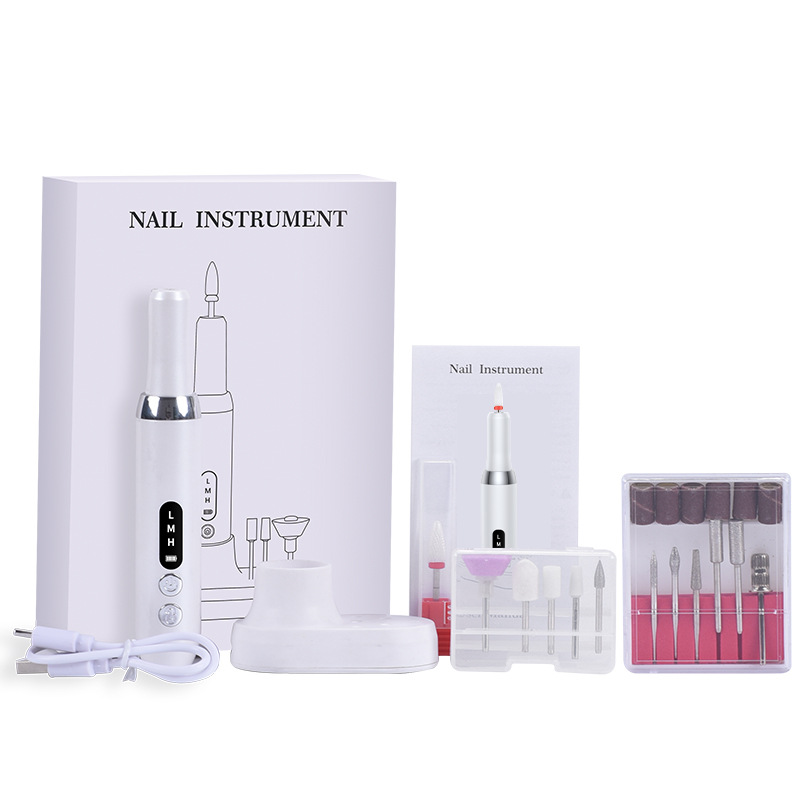
When I was a beginner, I kept looking for a good nail drill. This portable charging nail drill is my favorite. It is fully equipped, quiet and efficient, and has multiple speed adjustment levels. It is very suitable for beginners. With high performance and high configuration, it can also meet the needs of professional nail technicians.
Summarize:
Next: Set your nail drill to its lowest setting, grab your practice nails, and remember the mantras of “pinky anchor” and “gentle, continuous movement.” The nail drill isn’t your enemy—it’s the fastest way to professional-looking nails.
a nail drill for the first time ? What simple tips have helped you overcome it? Share your advice in the comments!