Professional Guide: Using a Nail Drill to Safely Remove Warped Acrylics or Hard Adhesive One minute

For those who frequently get extensions, experiencing some curling is almost inevitable. When the edge of the extension separates from the natural nail surface, the resulting gap can trap moisture and microorganisms, potentially leading to nail infection. Thoroughly and safely removing these curled areas is essential for subsequent repairs or re-creations.
I remember when I first started using a nail drill, the most common mistake I made was trying to use a high speed to “solve the problem quickly.” This resulted in overheating the nail and causing pain, forcing me to stop. Eventually, I realized that the key to safe nail removal lies in proper tool selection, speed control, and technique, not brute force.
Tool of choice: Specialized drill bits for hard plastic materials
When working with harder materials like acrylic nails or hard glue, using the right drill bit is key to safety and efficiency. Choose a drill bit that can quickly remove material while dissipating heat effectively to prevent overheating of the nails.
Select nail drill bit type according to function
| Processing tasks | Recommended drill bit types | Material characteristics and advantages |
| Body removal/quick removal | Tungsten carbide drill bits, especially safety heads | The sharp notch design is highly efficient and can quickly remove most hard glue. The safety head has a rounded top, reducing the risk of scratching the skin, making it suitable for beginners. |
| Precision edge processing/fine grinding | Ceramic drill bits or fine-grit tungsten carbide drill bits | Ceramic drill bits have good heat dissipation performance and low heat generation, making them suitable for sensitive areas. Fine grit is used for precise and smooth transition grinding at healthy boundary lines. |
| Final smoothing and cleaning | Sand ring | Used with a core drill bit for final smoothing and surface cleaning of the nail surface. |
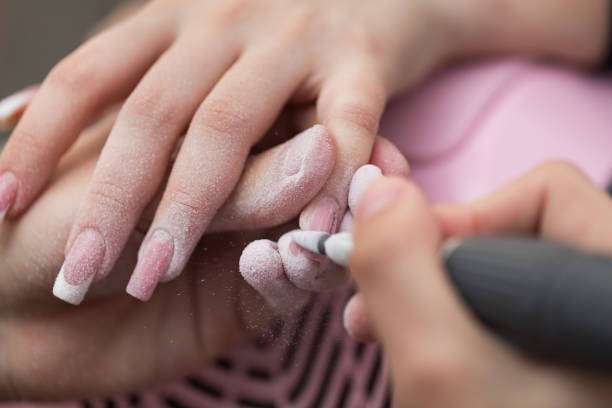
Practical process: key technologies to ensure safety and precision
Strict operating procedures must be followed when using a nail drill to protect the natural nail surface and finger skin from damage.
Preparation and setup before operation
Hygiene and Safety: Disinfect the drill bit and hands before operation. Wear goggles and a mask to avoid inhaling dust or debris that may injure your eyes.
Speed Setting: It’s recommended to start at a low to medium speed, approximately 10,000–15,000 RPM. The specific speed should be adjusted based on the thickness of the drill bit, the hardness of the material, and the operator’s skill level. The principle is to proceed at a low and steady speed to avoid friction and overheating at high speeds.
Determine the scope: Carefully inspect the nail surface and use tools to confirm all gaps and areas separated from the natural nail. These warped materials must be completely removed.
Electric drill operating skills
Angle control (to prevent damage): Approach the drill bit to the warped area at an angle between 10° and 45°.
Key Principle: Keep the body of the drill parallel to the nail surface and avoid applying pressure to the drill tip at right angles or perpendicular to the nail or cuticle. The correct angle allows you to effectively remove material while protecting the natural nail bed underneath.
Pressure and movement:
Light Pressure: Power drills rely on high-speed rotation, not pressure, to remove material. Maintain very light pressure. Excessive pressure can heat the nail and wear away the natural nail surface.
Movement technique: Use short, even “brushing” or “sweeping” motions. Start at the outer edge of the warp and work inward. Avoid staying in one spot for too long to distribute the heat generated by friction.
Find and treat the healthy border: Continue removing separated material until you see a healthy border where the extension material meets the natural nail surface again. This is the exact point where you need to stop removing material.
Then, switch to a fine-grit or ceramic drill bit and gently sand this healthy borderline to create a smooth, step-free transition with the remaining nail extension material. This will help prevent the material from starting to lift again at this point.
Post-processing and maintenance
After removing the edge material, wipe the nail surface with alcohol or a specialized cleaner to remove any dust. Check that the natural nail surface is smooth and undamaged. If the natural nail surface shows signs of excessive wear and tear, postpone the installation of new extensions or fillings and perform appropriate nail care to promote nail recovery.
Mastering these professional nail drill techniques can make nail maintenance more precise and safer, ensuring that your nails are always in optimal health.
Summarize:
Which drill bits are most comfortable for you when dealing with warping? What mistakes do you think are most common at home? Share your experiences below.