How to clean the motor of a wireless nail drill to extend its lifespan?

Wireless nail drills are essential tools for many nail art enthusiasts and professionals, widely used in the nail industry for their efficient sculpting, buffing, and finishing functions. With frequent use, dust, shavings, and oil stains gradually accumulate. These build-ups not only affect the device’s performance but can also lead to damage. Therefore, regular cleaning of the motor is crucial. This article will introduce how to clean the motor of a wireless nail drill and provide some practical tips to help extend the device’s lifespan.
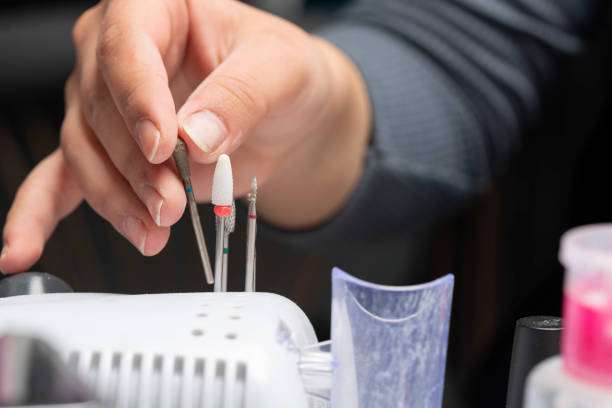
Why do we need to clean the nail drill?
The motor generates heat and friction during operation, making it prone to accumulating dust and debris. If not cleaned regularly, dust and debris can enter the motor, hindering heat dissipation and even affecting its normal operation. In the worst-case scenario, the motor may be damaged due to overheating. Proper cleaning and maintenance ensure the nail drill always performs at its best, preventing wasted time and money due to equipment failure.
Preparations before cleaning
Before you begin cleaning, make sure your nail drill is switched off and the power cord is unplugged or the batteries are removed. This prevents the equipment from accidentally starting during cleaning, ensuring the safety of the operation. Additionally, it’s best to clean in a well-lit, dust-free environment, as this will help you see the details of the equipment.
Cleaning steps
1. Disconnect the power supply and ensure safety.
Whether you are using a battery-powered or rechargeable nail drill, always ensure that the device is turned off and disconnected from the power source before cleaning. This is a basic safety measure to prevent the nail drill from accidentally starting up during the cleaning process, which could cause injury or damage to the equipment.
2. Clean the external surface.
the nail drill with a soft cloth or microfiber cloth. Wipe away dust, oil, fingerprints, and other debris. If there are obvious stains on the device, you can slightly dampen the cloth, but never allow water to seep into the motor. Excessive moisture may cause the nail drill to short-circuit or damage internal components.
3. Remove the motor housing (if possible).
Many wireless nail drills have a housing for the motor section, a design that protects the motor and helps prevent external debris from entering. If your equipment allows for housing removal, you can disassemble it for deep cleaning according to the instruction manual. Once disassembled, you can more easily clean the motor section, removing accumulated dust and debris.
Note: Not all nail drills are suitable for disassembly. If you are unsure how to disassemble them, it is best not to force it. Incorrect disassembly may damage the equipment or even void the warranty.
4. Use compressed air to remove dust.
If dust or fine particles have accumulated inside the motor, using compressed air is a very effective cleaning method. Aim the compressed air nozzle at the motor’s crevices and holes and gently blow air. This method can blow out most of the dust and debris without directly contacting the motor’s interior. It’s important to note that when using compressed air, avoid blowing the airflow directly at the motor for too long, as this could damage the motor’s internal components or circuitry.
5. Clean the shavings and oil stains inside the motor.
During engraving or polishing, shavings and oil stains may accumulate inside the motor. Gently brush away these contaminants using a soft-bristled brush (such as a toothbrush). Avoid using hard-bristled brushes, as they may scratch the motor’s surface or damage internal components. If your nail drill comes with dedicated cleaning tools, it’s best to use these tools to clean the motor section to ensure no damage is caused to the equipment.
6. Check the motor’s heat dissipation vents.
Nail drill motors are typically equipped with ventilation holes to aid in heat dissipation. Ensure these holes are not clogged with dust or debris; otherwise, the device may overheat and affect its efficiency. Gently clean these ventilation holes using a soft-bristled brush or the fine nozzle of a vacuum cleaner. Keeping the ventilation holes clear will help the nail drill operate stably for extended periods.
7. Check the motor’s lubrication.
Some motor components require regular lubrication. Check the equipment’s instruction manual to see if lubricating oil needs to be added to the motor. If necessary, apply an appropriate amount of lubricating oil to the motor’s moving parts. Be careful not to apply too much lubricating oil and ensure it is evenly distributed. Excessive lubricating oil may cause an unpleasant odor from the motor or contaminate other components around it.
8. Reassemble and test.
After cleaning, ensure all disassembled parts are reinstalled in their original positions. Check that all screws are tight and that the motor housing is secure and not loose. Then, reconnect the power and turn on the equipment to ensure the nail drill is functioning properly. If the equipment operates without issue, you have completed the cleaning process.
9. Regular maintenance
To extend the lifespan of the device, it is recommended to clean the motor regularly based on usage frequency. If you use the device frequently, cleaning it every 1-2 months is ideal. If you are a nail professional or frequently do DIY nail art, you may need to clean it more frequently.
Frequently Asked Questions
1. Can I wash the nail drill directly with water?
It is not recommended to clean the nail drill directly with water, especially the motor. Moisture may cause a short circuit or damage internal components. Use a slightly damp cloth to wipe it, avoiding getting water into the motor.
2. My nail drill has a lot of grinding debris. How can I clean it?
You can use a soft-bristled brush (such as a toothbrush) to gently brush away the shavings inside the motor or use compressed air to blow them away. When cleaning, make sure that the brush bristles or airflow do not enter the electrical components inside the motor.
3. What should I do if the nail drill overheats?
Overheating is usually caused by clogged vents or excessive internal dust buildup. Ensure the nail drill’s vents are clean, and clean the equipment regularly. If the overheating problem persists, it may be necessary to check if the motor requires lubrication or if there is a malfunction in the equipment.
4. How do I clean the batteries in a nail drill?
Nail drill batteries usually don’t require special cleaning, but you can wipe the battery contacts with a clean cloth to prevent dirt from affecting the battery’s charging performance. Be sure to avoid getting water into the battery during cleaning.
Summarize:
Cleaning and maintaining the motor not only ensures the long-term smooth operation of your equipment but also improves work efficiency and extends its lifespan. Regular inspection and cleaning ensure your equipment is always in optimal condition, preventing malfunctions caused by dust buildup or overheating. Follow the steps in this article to easily clean your nail drill and enjoy a longer nail art experience. If you’d like to learn more cleaning and maintenance tips, continue to follow our blog for more practical tips and advice!