
In nail art, dotting has long been a classic and popular technique. However, while traditional dotting pens are simple and easy to use, they often struggle to provide the required precision and three-dimensional effect. In recent years, electric nail drills have gradually become an essential tool for nail technicians. Originally used for nail removal and buffing, electric nail drills offer unique advantages in dotting designs due to their precise control and micro-grinding heads.
By using an electric nail drill, dotted designs are no longer limited to surface decoration but can be elevated to an artistic level of three-dimensional sculpting and intricate inlay. This tool brings more design possibilities, making nail art more delicate and durable.
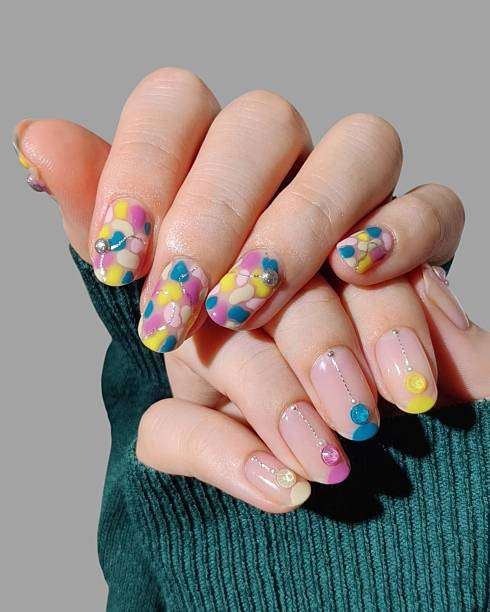
Nail surface micro-sculpting: dot relief and texture art
A key advantage of electric nail drills is their ability to micro-sculpt on the nail surface, creating intricate recessed or embossed effects that give dotted designs a three-dimensional and layered look.
relief and texture
Traditional dotted designs typically involve directly applying or dotting color onto the nail surface, resulting in a relatively flat effect. However, electric nail drills, using micro-sculpting technology, can sculpt dots of varying depths onto the nail surface, creating a much richer visual effect. This method can mimic the textures of leather, pebbles, or matte finishes, adding tactile texture and depth to the design.
The embossed dot design can bring a stronger artistic impact to nail art and also show a sense of layering that is completely different from flat design under light.
The key to precise control
Grinding head selection: Using a pointed or micro diamond grinding head is key to fine engraving. This type of grinding head ensures that the engraved dotted textures are precise and delicate.
Speed control: Set the electric nail drill to low speed to ensure a smooth and precise engraving process. Low speed not only helps…
Controlling the temperature prevents the nail surface from overheating and also avoids uneven results during the carving process.
Operating tips: Use gentle tapping or circular motions to sculpt, and avoid staying in the same spot for too long to reduce heat buildup and damage to the nail surface.
Jewelry setting and positioning: Creating the perfect foundation
Dotted designs are not limited to applying and carving paint; many nail art pieces also require the addition of embellishments such as rhinestones, pearls, or small steel beads. The stable placement of these embellishments often determines the overall effect and durability of the design.
A stable base for jewelry
When setting embellishments, an electric nail drill can precisely create positioning grooves on the nail surface, ensuring the embellishment is securely embedded. This is especially beneficial for larger or heavier embellishments, such as rhinestones and pearls, where traditional dotting tools cannot provide sufficient stability; the precise control of an electric nail drill effectively solves this problem.
By precisely grinding the positioning grooves, the decorations can be embedded more smoothly into the nail surface, reducing the risk of falling off, and ensuring that the position of the decorations will not shift before the gel cures.
Applications of spherical grinding heads
Grinding head selection: Small ball-shaped grinding heads are ideal tools for positioning jewelry. Their round design allows for precise shallow grooves to be ground into the nail surface, providing a perfect “base” for the jewelry.
Timing: Carve after the base coat or shaping adhesive has fully cured to ensure the ornament can be securely embedded.
Operating tips: Using a ball-shaped grinding head, gently grind a shallow indentation slightly smaller than the jewelry in the desired placement area to ensure the jewelry remains stable during the colloid curing process.
Exquisite Cleaning: A Perfect and Seamless Jewelry Transition
After completing the dotted design, a small amount of glue or top coat often remains around the decoration. This excess glue not only affects the appearance but may also cause the decoration to not adhere smoothly to the nail surface or even easily snag on clothing or hair.
Eliminate adhesive residue and maintain a seamless transition
Electric nail drills can efficiently remove these tiny glue residues, resulting in a smoother, more natural transition between the embellishment and the nail surface, achieving a perfectly seamless effect. Especially when setting intricate embellishments, cleaning the surrounding glue layer is crucial for the overall refinement of the design.
Choose a safe grinding head.
Grinding head selection: We recommend using a small round ceramic grinding head. This type of grinding head can effectively remove the residual glue layer and avoid damage to the nail surface.
Operating tips: Set the speed to medium-low and gently polish around the jewelry to remove excess adhesive. The key is to ensure the edges of the jewelry are smooth and even for a natural transition.
I remember the first time I tried sculpting dotted nails with a micro-grinding tool; the precision was simply breathtaking. It made me realize that this wasn’t removing nail polish but rather creating “miniature architecture”! Mastering the precise application of these three electric nail drills is key if you want your dotted designs to have salon-quality professionalism and durability.
Golden Rules for Safe Use of Electric Nail Drills
Electric nail drills are efficient and precise tools that help nail technicians achieve accurate carving and design, but they require special care to avoid damaging the nail surface or generating unnecessary heat.
Safe operating principles:
Low-speed operation: Maintain a low rotation speed throughout the process of fine engraving and cleaning. Low speed effectively prevents overheating, controls head vibration, and ensures smooth and precise operation.
Zero-pressure operation: This method utilizes only the weight of the grinding head to avoid applying excessive pressure. Excessive pressure can not only affect the carving result but also damage the nail surface.
Correct grinding head selection: Use grinding heads suitable for fine operations, such as pointed or spherical grinding heads, rather than large-particle grinding heads used for large-area operations.
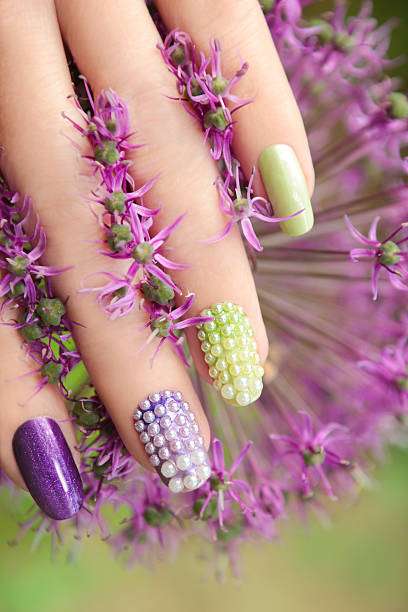
Summarize:
The introduction of electric nail drills has brought unprecedented precision and artistry to dotted nail designs. From micro-sculpting and embellishment placement to meticulous cleaning, electric nail drills make each nail art piece not only more refined but also more durable. For nail technicians,
This tool is no longer just a simple auxiliary tool but a powerful assistant in creating exquisite and complex nail art.
Mastering the use of an electric nail drill can elevate your nail art to a whole new level in terms of visual appeal and durability. Whether adding a three-dimensional feel to traditional dot designs or providing precise positioning for embellishments, electric nail drills deliver flawless artistic results.