
In both home and professional nail salons, nail drills have become indispensable tools. Whether it’s removing cuticles, buffing nail surfaces, treating calluses, or creating more intricate sculpting designs, nail drills significantly improve efficiency. However, many people often neglect how to store the drill bits, focusing only on the maintenance of the nail drill itself.
In fact, the drill bit is the soul of nail drill performance and safety. If the drill bit is not cleaned properly or stored carelessly, it will not only significantly shorten its lifespan but may also lead to scratches, uneven filing, overheating, or even infection risks during nail art.
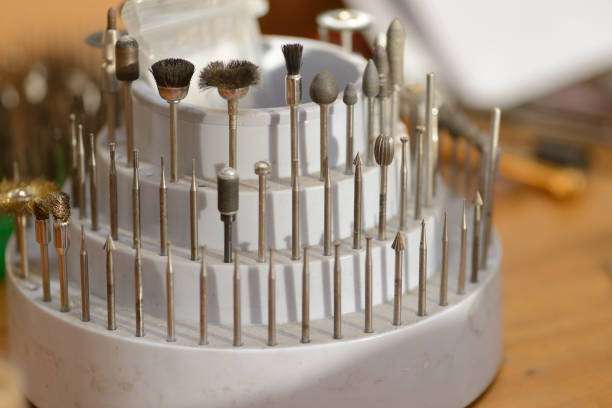
Why proper storage of drill bits is crucial for nail drills
Many people casually leave drill bits on a table or put them in a small box, thinking that drill bits look very hard and don’t need much protection. But in fact, whether it’s tungsten carbide, ceramic, diamond, diamond grinding bits, or sand grinding bits, they will all experience varying degrees of wear and tear when exposed to air, dust, and moisture for a long time.
For professional nail technicians, the hygiene and sharpness of nail drill bits are paramount. Improper storage increases the risk of cross-infection and can cause the nail drill to overheat, jam, or produce uneven polish during prolonged use, significantly diminishing the customer experience. Therefore, storing nail drill bits neatly and systematically is crucial for maintaining consistent nail drill output.
In daily nail care, the nail drill is one of the most important tools, and the drill bit, as a core component, needs to be properly maintained and stored.
I remember the first time I used a nail drill to do a friend’s nails; I just left the drill bits on the table. The next day, I found that several of the drill bits had small chips on the edges, which made me realize the importance of proper storage.
Drill bit cleaning procedures that must be performed after using a nail drill.
Each use of a nail drill is to thoroughly clean the drill bit. Nail powder, skin flakes, and keratin debris can accumulate in the grooves on the drill bit’s surface. If not cleaned immediately, this can affect smoothness during the next use and even breed bacteria.
The correct cleaning procedure should begin with dry brushing. Use a small, dedicated brush to gently rotate the drill bit under running water, or brush the grooves directly to remove all visible dust. Remember not to use a stiff steel brush, as this may scratch the surface texture.
For professional environments, many nail technicians choose ultrasonic cleaners to immerse the drill bits in a specialized cleaning solution for deep cleaning. Ultrasonic cleaning allows nail drill bits to more thoroughly remove residue, and it is particularly effective for tungsten carbide drill bits with deep grooves.
After cleaning, be sure to check the drill bits for any residual dust, especially the sanding and diamond grinding bits. These drill bits have rough surfaces, and if residue is not cleaned in time, it will definitely affect the grinding effect the next time they are used.
Each use of a nail drill, I first clean the nail polish from the drill bit’s crevices with a brush, then disinfect it with alcohol. This is a habit I’ve developed over many years of doing my own manicures at home. Occasionally, I use small clips to hold the drill bit on the table for cleaning, so I don’t have to worry about slipping and damaging it.

Disinfection is a key step in making nail drills safer.
For home users, alcohol disinfection is usually sufficient. However, for professional nail salons, nail drill bits require a more rigorous disinfection process. Common methods used in the nail industry include alcohol soaking, UV disinfection chambers, dry heat disinfection chambers, and soaking in disinfectant tablets.
Alcohol soaking is the most common method. Simply immerse the drill bit in 75% alcohol for about ten minutes, then wipe it clean with a lint-free cloth. A UV sterilization chamber is used for further sterilization, but it cannot replace the cleaning step. While a dry heat sterilization chamber is more effective, it is essential to ensure that the drill bit material can withstand high temperatures.
Nail drills, in particular, are often used to treat dead skin and periungual keratin; if disinfection is not done properly, inflammation may occur.
The drill bit must be completely dry before storing it; otherwise, it will be ruined.
Many people wipe the drill bit casually after taking it out of the cleaning water and put it back in the box, which is the most likely way to damage the drill bit.
Moisture accelerates the oxidation of tungsten carbide, causing the metal surface to darken or even corrode, and also enlarges the fine lines on the surface of ceramic drill bits.
Drill bits must be completely dry before storage. You can air-dry them on paper towels or use a hairdryer on a low setting. Professional nail salons typically use an air compressor gun to blow away moisture, allowing the drill bits to dry completely within one minute.
Even a small amount of residual moisture in an incompletely dried drill bit will create condensation when sealed for storage, resulting in a prolonged damp environment. Over time, this will degrade the quality of the drill bit, make cutting difficult, and may even cause mold or unpleasant odors. Once these issues arise, the drill bit is essentially irreparable.
Categorized storage is the core method to prevent damage.
storing nail drill bits, sorting is extremely important. Many beginners put all the drill bits in a small bag, which causes them to squeeze together, leading to wear or chipping.
The correct way is to use a drill bit storage box with individual hole slots or cushioning dividers. Each drill bit has its own place, preventing collisions and allowing you to quickly find the type you need when using a nail drill.
The classification can be done according to the following logic: by grinding head material, by application, by coarseness, and by daily vs. professional use. This not only protects the drill bit but also improves workflow efficiency.
For nail technicians who frequently travel to provide in-home services, it is recommended to use a hard-shell portable case to prevent damage to the drill bits caused by vibration during transportation.
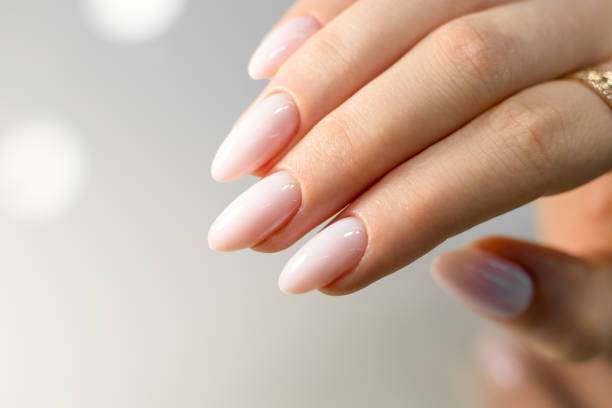
The storage environment must be kept dry and clean.
Nail drill bits should not be placed in bathrooms, near sinks, or in high-humidity areas, and especially not in direct sunlight. High humidity accelerates oxidation, and strong light can cause some drill bit materials to age. The ideal storage environment is dry, cool, and away from dust.
Conclusion:
The drill bit is the most important and delicate part of a nail drill. Proper cleaning, disinfection, drying, and storage can extend the tool’s lifespan, make the nail art process more hygienic, and ensure smoother and more stable filing each time.
Whether you’re a professional nail technician or someone who enjoys doing your own nails at home, mastering the correct storage methods will ensure your nail drill always performs at its best and enhances your daily user experience.
Visit our website to learn more about nail drill maintenance tips!