Safely repair tiny cracks and prevent nail splitting in 3 steps with a nail drill

Have you ever experienced this frustrating moment: you’ve just finished a perfect manicure, only to accidentally bump into something and instantly develop a tiny crack at the edge of your nail, or your nail tips start to separate into unsightly layers? Professionals know a secret: a nail drill. This tool is no longer just a bulldozer for removing gel; equipped with the right drill bit and speed, it instantly transforms into a precise and gentle helper. It can smooth and even “seal” those dangerous cracks with a precision that a file simply cannot match.
Step 1: When should I get a nail drill, and when should I see a doctor?
Before you start the nail drill, be sure to perform a quick damage assessment. Remember, this tool is for repair, not treatment.
Enable nail drill:
Slight splitting: Multiple layers of nails peel off at the edges.
Tiny crack: A small crack that has not yet penetrated into the flesh on the side edge or tip of the nail.
Rough edges: The nail tip is not smooth due to bumps or knocks, making it easy to snag clothing.
Signals that require immediate cessation of operation (please seek professional medical help):
The laceration had penetrated deep into the living flesh, causing bleeding.
Signs of infection, such as redness, swelling, and pus, appear around the nails.
Step 2: Select the correct tools and parameters
For delicate restoration work, you must ditch the rough drill bits and high-speed spinners used to remove gel nails. This is the key difference between professionals and novices.
Nail drill configuration
| Configuration Project | Professional Recommendation | Why this one? |
| Drill bit type | Ultra-fine (Fine/XF) bullet-shaped or tapered diamond drill bits | Diamond is the gentlest material; its cone or bullet shape makes it easy to precisely target and repair cracks. |
| RPM settings | 8,000 RPM or lower | Extremely low speeds are key to avoiding thermal friction and vibration. What you need is control, not horsepower. |
| Grip posture | “Pencil-style” grip + little finger support | Like a surgeon holding a scalpel, use your little finger to hold it firmly on the client’s/your own skin to ensure absolute stability. |
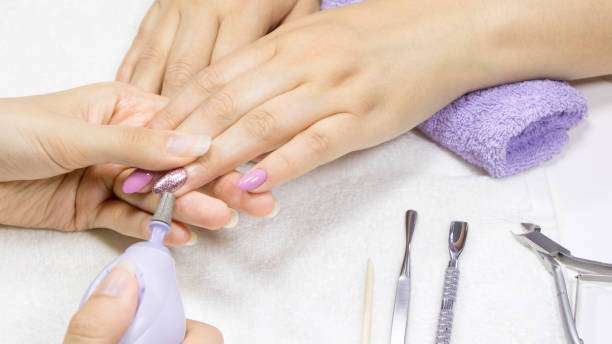
Step 3: Seal the crack with a nail drill.
Once you have your tools ready, the repair process must follow a professional logic from the outside in.
Smoothing operation: Eliminating the “trigger point” of the chain reaction. The goal is to remove all loose, raised nail fragments, which are the “fuel” for the crack to continue to widen.
Using your choice of ultra-fine nail drill bit, gently “sweep” along the crack area at extremely low speeds.
Do not press. The movements should be light and quick, like brushing dust off the nail surface. We are smoothing, not cutting.
Key point: Your drill bit must always be at the same angle to the edge of your nail to ensure a smooth transition.
Side edge “sealing”: Preventing the crack from spreading laterally. If the crack is located on the side edge of the nail, you need a precise “sealing” action.
Use the tip of a nail drill tapered bit, perpendicular to the edge of the nail.
Starting from the crack, “draw” across it gently and at a very low speed in one continuous motion. This quick, slight movement smooths out the edges of the crack, eliminating any possibility of snagging. It’s like putting a safety patch on the crack.
Reshaping: Optimize the nail tip to prevent it from snagging again. The repaired nail edge may no longer be perfect and must be reshaped to ensure its strength. Switch to a slightly larger, fine cylindrical drill bit and reshape the entire nail tip edge.
Final polishing and base protection
After the repair work is completed, the nail surface will have a very fine roughness. Use a buffing head to perform a final fine buff on the repaired area until the surface feels completely smooth to the touch.
Healthy Repair Solution: Immediately apply a strengthening base coat containing keratin or calcium. This “liquid bandage” increases the resilience of the repaired area. Finally, use a generous amount of high-quality cuticle oil to nourish the entire nail plate and surrounding skin.
Summary and Refinement:
When your nails are in trouble again, don’t rely on harsh files. By mastering the correct drill bit selection, low-speed control, and a precise “pencil-like” grip, your nail drill will become a powerful nail health tool. From nail removal to first aid, it proves that the key to professional tools lies in precision, not brute force.
Starting today, treat your nail drill as an ally of your nail health, not just a nail tool.