Nail Drilling Techniques: A Complete Guide from Beginner to Expert

In the nail art process, soft nails (also known as gel nails, false nails, or soft gel nails) are loved by many for their natural shine and comfort. However, filing soft nails is the part where beginners are most prone to making mistakes. Improper handling can easily damage the nail surface or make it uneven. This is where a nail drill becomes the preferred tool for many nail technicians and enthusiasts. This article will explain in detail the techniques for filing soft nails with a nail drill, allowing you to easily master the secrets of soft nail filing.
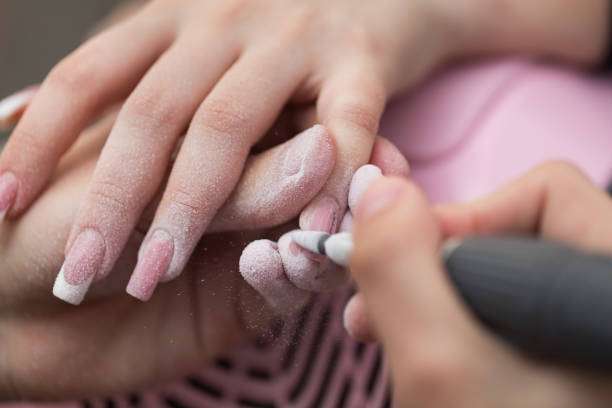
Why choose a nail drill for polishing soft nails?
While hand-buffing soft nails can accomplish basic tasks, it’s inefficient and prone to uneven nail surfaces and rough edges. Using a nail drill offers the following advantages:
More efficient: Compared to hand filing, nail drills can quickly remove excess soft nail material, saving a lot of time.
More even polishing: By using different types of drill bits, the polishing depth and shape can be precisely controlled, resulting in a smooth and natural nail surface.
Easier to operate: Especially for long periods of nail work, using a nail drill can reduce hand fatigue.
When I first started using a nail drill, I was worried about damaging my nails. After a week of practice, I found it easy and efficient to use, especially when filing the edges of soft nails; the drill’s precision surprised me.
Preparations before buffing soft nails
using a nail drill, as it not only ensures effective filing but also protects nail health.
Clean your hands and nails.
Wash your hands with warm water and ensure that there is no oil or dirt on your nails. You can gently wipe the nail surface with nail polish remover to ensure that the drill bit makes good contact with the soft nail.
Commonly
Used drill bit types for polishing soft armor include:
Cylindrical drill bit: Suitable for quickly removing materials from soft nail surfaces.
Tapered drill bit: used for grinding edges and nail corners.
Sponge drill bits or flexible drill bits: suitable for polishing soft nail surfaces, making the nail surface smooth and natural.
Adjusting the nail drill speed:
Soft nail materials can be damaged by excessively high speeds. It is generally recommended to set it around 5000-8000 RPM. Beginners can start with a low speed and gradually adapt.
Wear protective measures.
Nail drills generate micro-dust during the grinding process, so it is recommended to wear a mask and goggles and keep the operating environment well-ventilated.
Nail drill techniques for filing soft nails
Mastering the correct techniques is key to avoiding nail damage and achieving the desired results.
1. Start from the center of the nail surface.
When buffing soft nails, it is recommended to start from the center of the nail surface, gently touching the drill bit to gradually smooth the surface. Keep the drill bit perpendicular to the nail surface during operation to avoid excessive tilting, which can result in an uneven surface.
2. Control the force and angle
Soft nails are quite delicate, and applying too much force can easily cause scratches or create weak spots. The following are some techniques for handling them:
Apply gentle pressure: simply let the drill bit glide lightly across the soft nail surface.
Appropriate angle: Keep the drill bit at about 90° to the nail surface, with the edge slightly angled, to file down to the edge of the nail.
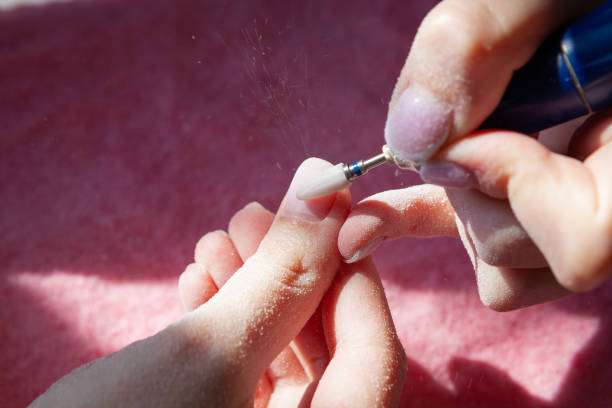
Tip: You can place your hand on the table for support to avoid uneven sanding caused by shaky hands.
3. Sanding by area
Divide each nail surface into the center area, the two side edges, and the tip area, and buff each area one by one. This will allow you to:
Avoid over-polishing in certain areas
Make the nail surface smooth overall
Maintain uniform thickness of soft nails
4. Be careful with edge processing.
The edges of the nail surface are prone to becoming raised or uneven, requiring gentle trimming with a tapered drill bit or a sponge drill bit. Work slowly to avoid scratching the skin or nail surface when the drill bit slides.
5. Polishing sequence
The recommended order is
Initial buffing of soft nail surface: removing excess thickness
Edge finishing: Smooth transition
Surface polishing: Use a flexible drill bit or a sponge drill bit to make the nail surface smooth and natural.
Precautions and common mistakes
When using a nail drill to polish soft nails, please pay attention to the following issues:
Avoid prolonged buffing in
one area. Buffing the same area for too long may thin the nail surface or cause a burning sensation. It is recommended to buff for 5-10 seconds each time, rest for 2 seconds, and then continue.
drill speed
can generate heat, potentially damaging the nail surface or soft nails. For soft nail tips, a low-speed, slow filing method is recommended.
Keep the drill bit clean.
Soft nail residue on the drill bit surface will affect the polishing effect and may scratch the nail surface. Clean the drill bit with a cleaning brush every now and then.
Avoid over-sharpening
soft nails. Over-sharpening not only affects the appearance but also reduces the durability of the nail tips. A thickness of 0.5-1 mm is generally sufficient.
I once buffed my nails too quickly, causing tiny scratches on the surface. Later, I switched to a low speed and buffed in sections, which significantly improved the situation.
Comparison of nail drill and hand buffing
| project | Hand polishing | nail drill |
| efficiency | Slower | Fast and efficient |
| flatness | Relying on experience | Easy to operate and uniform |
| Control | lower | High precision, adjustable speed |
| Operational fatigue | Easily fatigued | Reduce hand pressure |
Overall, nail drills have significant advantages in soft nail polishing, making them especially suitable for beginners to quickly get started while ensuring an even and smooth polishing effect.
Post-polishing maintenance and finishing touches
After buffing the soft nails, the following steps can be taken:
to remove residual powder from the nail surface,
removing any powder produced during polishing.
Apply conditioning oil or nourishing solution
to protect the nail surface and cuticles, preventing dryness and cracking.
Check the smoothness of the edges
to ensure the nail tip edges are smooth and to avoid snagging or scratching the skin.
Nail drill selection suggestions for beginners
If you are new to soft nail polishing, choosing the right nail drill is very important:
Adjustable speed: makes it easy to control the polishing force of soft nails.
Multiple drill bit accessories: to meet different grinding needs
Anti-slip grip: for more stable operation
Low noise design: Reduces interference during use
The nail drill I use comes with a wide variety of drill bits, making it very convenient for even the most delicate work on soft nails and making sanding easy and professional.

Summarize
Mastering nail polishing techniques and using nail drills properly can make your nails smoother, more natural, and longer-lasting.
By using the methods above, both beginners and experienced nail art enthusiasts can easily master soft nail polishing techniques, ensuring that every nail art session achieves a professional result.
nail drill for buffing soft nails, you might want to check out some highly rated models with complete accessories to improve your nail art efficiency and experience, making your fingertips even more perfect!
nail drill now and make buffing soft nails easier and more efficient!