
If you’ve ever tried doing your own nails, you’ve definitely experienced the nerve-wracking moment of the handle slipping when using a nail drill, especially when working with your non-dominant hand (usually your left). For professional nail technicians, whether it’s for perfect angle switching or finding the most ergonomic position on the client’s hand, using your non-dominant hand is an unavoidable hurdle.
This is not just a matter of “habit,” but a challenge of physics and fine motor skills. nail drill As a high-speed tool, the risk of loss of control and over-grinding increases exponentially when operating a nail drill in reverse.
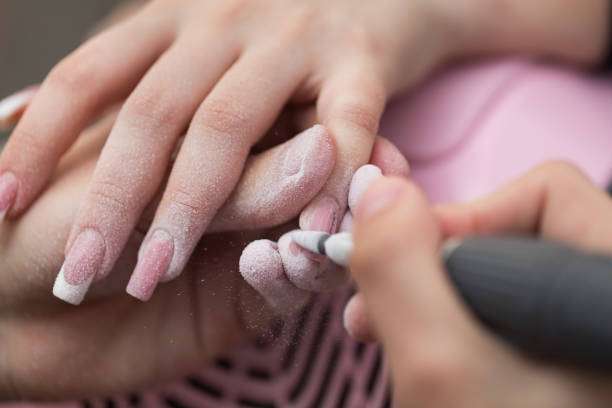
Abandon flexibility—embrace stability above all else
When performing reverse or counter-grip movements, our brains and muscle memory demand a greater sense of “control.” However, attempting to achieve the dexterity of the dominant hand with the non-dominant hand is often the beginning of mistakes. We must fundamentally change our core philosophy: shift your grip approach from pursuing “flexibility” to pursuing “stability.”
When operating with your dominant hand, you can move freely across the nail surface, but when operating with your non-dominant hand, your goal is to anchor your operating hand like a steel anchor. This stability effectively counteracts the tremors or accidental slippage caused by insufficient muscle control in the non-dominant hand.
Improved grip technique: Taming high-speed nail drill
The traditional “pencil grip” is fundamental, but in reverse grip operation, we need to upgrade it to meet the higher stability requirements. The reverse grip optimization of the pencil grip maintains the normal posture of using the thumb, index finger, and middle finger to control the handle, just like you are holding a pen.
Key improvements to the backhand:
Light pressure: In a backhand grip, the downward pressure (or grip) should be much lighter than with your dominant hand. Your primary power should not come from the grip itself but from the support point you set.
Ensure even pressure: Focus on applying completely even pressure to the nail drill using your index and middle fingers. Any unevenness will cause the high-speed rotating drill bit to vibrate or twist at your fingertips.
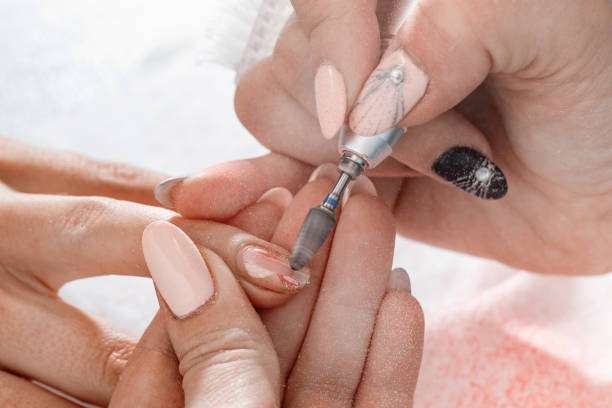
The triangular support advantage of the three-finger lock: When handling hard materials that require higher torque, such as acrylic or hard gel, the ordinary pencil grip may not be stable enough. In this case, the three-finger lock provides tripod-like support:
Move your middle finger forward: Move your middle finger slightly forward so that it is close to the connection between the nail drill head and the handle.
Physical advantages: This method of distributing force to three support points closer to the end of the drill bit forms a triangular support, which can effectively resist the lateral thrust generated by the drill bit when cutting the material and prevent the handle from tipping over.
Key support point settings for reverse hand operation
The support point is the most crucial secret weapon for backhand operation. It provides a fixed anchor point, limiting your operating range to a safe area.
Analysis of Scenario-based Support Point Application
Self-manicure (backhand): Your support point should be your pinky or ring finger, firmly resting on the edge of your wrist or palm beneath the nail you are working on. This uses your wrist or a table as a base, providing an absolutely stable reference and completely eliminating any wobbling of the nail drill from your upper arm and wrist.
Professional cuticle removal: When working with a client, gently place your pinky finger along the nail edge or knuckle of the client’s adjacent nail. This restricts minute movements of the handle, making it especially suitable for areas requiring high precision, such as the nail edge.
Removing nail polish: When you need to remove large areas of material, firmly rest the bottom edge of your palm on the table. This uses the large surface area of your palm to balance the lateral thrust generated by the drill bit when removing material.
Thoroughly clean the nail edges: Use your thumb as a compass fulcrum, gently resting it against the client’s knuckle. This creates a tiny center of rotation, allowing you to clean the nail edges in a circular motion around the knuckle, preventing straight cuts to the skin.
Practical Tips: In any situation, always ensure your elbows and forearms are resting stably on the table. When using a reverse grip, only your fingertips should be slightly adjusted; most of the stability should come from your forearms. Consider using a manicure hand rest or hand pillow to stabilize your hand while you are working.
Equipment Setup and Security: Details Determine Success or Failure
In reverse hand operations, technique alone is not enough; proper equipment settings are key to preventing accidents.
Nail drill: don’t forget to switch the ironclad rule of rotation direction. This is a mistake that beginners make most easily, but it is the cornerstone of safety and efficiency: when you change the operating angle or switch to the other hand, you must switch the rotation direction of the nail drill.
Cutting principle: The drill bit should always cut from the operating area toward the handle, not hook into your skin or nail edge. If you are using your right hand to work on the left side of your left index finger, you must switch the drill bit to reverse (R). This ensures that the drill bit effectively “pulls” the material away, rather than dangerously “pulling” or “hooking” the nail.
Lowering RPM can compensate for decreased perception. When operating with your non-dominant hand, your hand’s perception and reaction speed will naturally decrease.
Recommended rotation speed: When performing delicate backhand strokes such as cleaning cuticles or nail edges, please reduce the rotation speed by 20% – 30%. Beginners are advised to start practicing at a low speed of around 8,000 RPM until they are fully accustomed to the stability and support point settings of the backhand stroke.
Abandon the mindset that brute force leads to miracles. When operating with our non-dominant hand, we instinctively try to gain a sense of control by applying force. Please avoid this!
Nail Drill Core Safety: Always use finer nail drill bits (such as fine-grained ceramic) and maintain gentle, multiple sweeps. You only need to apply enough pressure to get the bit into contact with the nail surface, then let the high-speed rotating bit complete the cutting work on its own.
In conclusion:
Reverse/left-handed operation is no longer an obstacle in nail art. It’s less about technique and more about a systematic approach to physical stability and safe procedures.
By mastering the three-finger lock grip and setting up scenario-specific support points, you can transform your operator’s hand into an indestructible robotic arm, enabling you to use the nail drill with zero errors at any complex angle.
Have you ever had to start all over again because of a mistake while doing nail art with your hand? Feel free to share your “Nail Art Weak Hands” challenge and how you overcame it in the comments section.