
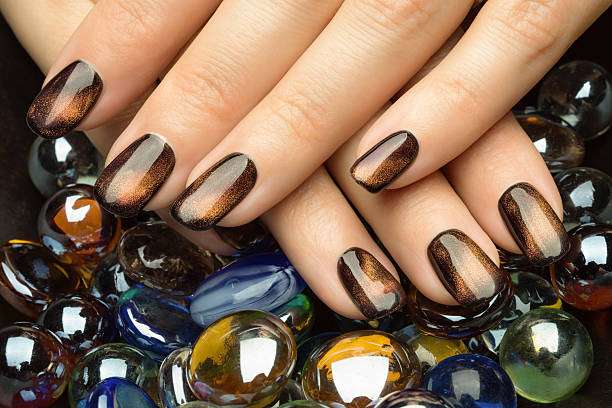
While the gel polish itself is important when creating cat-eye nails, the key to a smooth finish and even magnetic texture is actually the pretreatment. Using a nail drill for pretreatment not only results in a cleaner nail surface and better gel adhesion but also prevents issues like peeling, flaking, or the magnetic powder not showing up properly.
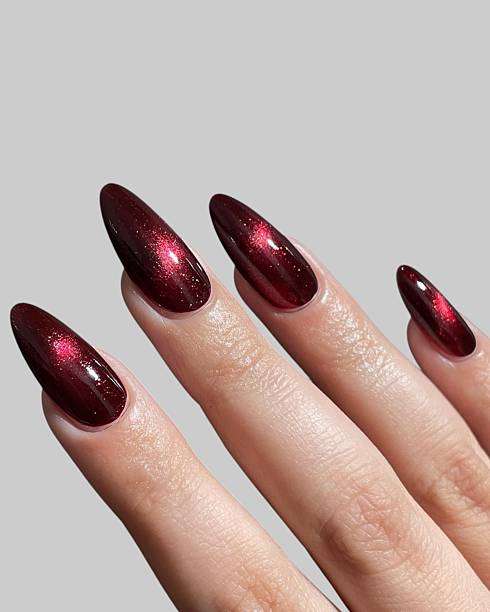
nail drill the first choice for pretreatment of cat-eye nails?
Compared to hand files, it offers a more stable, precise, and efficient finish, making it especially suitable for styles like cat-eye nails that require a high degree of smoothness and cleanliness.
Advantages of using nail drill
High efficiency: Quickly removes old nails, dead skin, and uneven surfaces.
More uniform: Allows for more stable adhesion of the photogel and cat-eye magnetic powder.
Reduce human error: both force and speed are easier to control.
It can reach hard-to-reach areas such as sidewalls and nail edges.
Before creating cat-eye nails, the nail surface must be
free of grease, dead skin, bumps, burrs, and old glue residue.
This is precisely what a nail drill excels at.
A Guide to Choosing the Right Drill Bits for Cat-Eye Nail Treatment
, To help you better operate the nail drill, here is a summary of commonly used drill bits and their functions for pretreatment of cat’s eye nails:
1. Dust brush head (cleaning)
at low speed with a nail drill to remove surface dust; it’s very gentle.
2. Sanding ring or sandpaper ring (coarse grinding)
Used to remove old glue.
Suitable for beginners because wear and tear is manageable.
3. Flame head (dead skin removal)
Clean the cuticles and corners of the walls.
It is one of the key steps in the pretreatment of cat-eye nails.
4. Round head (polishing and soft skin removal)
It makes the nail surface and edges smoother and improves the adhesion of subsequent UV gel.
5. Fine polishing head (to adjust the smoothness of the nail surface)
To prevent the cat-eye gel from developing color and causing any breaks in the texture.
a nail. Complete steps: How to use a nail drill for pretreatment of cat-eye nails.
Below is a standard procedure suitable for beginners and semi-professional technicians.
Step 1: Clean hands and nails
Rinse and dry your hands thoroughly.
Disinfect the nail surface with alcohol wipes.
A nail drill is not needed; it’s just basic preparation.
Step 2: Use a nail drill to remove the old nail.
Recommended drill bit: Sandpaper
speed: 8,000–12,000 RPM
Key techniques:
Gently touch the nail surface and let the nail drill remove the old glue on its own.
Keep the direction consistent to reduce scratches.
Avoid staying in the same spot repeatedly to prevent overheating.
Using a nail drill to remove old gel, you don’t need to file the nail surface very thin; just remove the surface layer.
Step 3: Use a nail drill to remove dead skin from the cuticles.
This part determines whether the cat-eye nail polish will be clean and adhere well.
Recommended drill bit: Flame bit + Ball bit;
Speed: 5,000–8,000 RPM
Operating Tips:
Use the flame tip to gently push along the edge of the nail to lift up the small dead skin.
Then replace the ball head with a round one to remove dead skin and debris.
Move slowly along the side wall to avoid scratching your skin.
Important:
Nail drills should only touch dead skin, not the dermis!
This is a problem many beginners encounter: a slight tremor in the hand can easily cause red marks, so a lower speed is safer.
Step 4: Lightly buff the nail surface with a nail drill.
Cat-eye gel is very sensitive to “adhesion.” If there is oil, shine, or bumps on the nail surface, it will affect the flow of magnetic powder and cause uneven cat-eye texture.
Recommended drill bit: Fine grinding polishing head.
Speed: 4,000–6,000 RPM
Tips:
Keep moving in one direction to make the nail surface texture even.
Remove the natural shine from the nails, rather than thinning them.
The sides should also be evenly coated to prevent curling later.
The key here is to make the nail drill feel as light as a feather, just “sweeping” the nail surface rather than “digging away” the nail layer.
Step 5: Clean the surface dust with a nail drill.
Recommended drill bit: Dust brush head.
Speed: 3,000–4,000 RPM
Why use a nail drill to clean surface dust instead of brushing by hand?
Because the rotating brush head can reach into the nail grooves and side wall crevices, it cleans more thoroughly, and the cat-eye gel is applied more evenly.
Step 6: Degreasing and applying primer
Use alcohol or a cleanser to remove grease.
Apply a thin layer of base coat.
Light curing
Degreasing is crucial; otherwise, all the pretreatment done with the nail drill will be wasted.
Nail drill usage tips: safe and efficient
To make things easier for you before dealing with cat-eye nails, here are some of the most common techniques.
1. Control the speed of the nail drill.
Removal of old nails: 8,000–12,000 RPM
Dead skin removal: 5,000–8,000 RPM
Light buffing of nail surface: 4,000–6,000 RPM
Cleaning dust: 3,000–4,000 RPM
Higher speed is not necessarily better, especially when dealing with dead skin, which must be done slowly.
2. Always keep the nail drill moving.
Stopping in the same position will:
fever
stinging
Damaged deck
Lateral movement is easier to control for safety than longitudinal movement.
3. Keep your hands steady, supporting yourself on the table with the back of your hands.
Let the nail drill follow the nail surface naturally, instead of pressing it down forcefully.
4. Avoid excessive contact between the drill bit and skin.
If your hand slips and touches your skin, it can easily:
Scratching
Causes redness and swelling
Causes discomfort
This can be avoided by reducing the speed.
Common mistakes beginners make: Don’t use a nail drill like this.
The following factors will directly affect the effect of cat-eye nails:
Nail surface too thin
Cat-eye gel nails need a smooth, natural nail surface for support; filing them too thin can actually make them more prone to breakage.
Dead skin not completely removed
This can cause the cat-eye UV gel to lift at the edges.
Nail surface dust
The magnetic powder flow is uneven, appearing as a fault.
Use a coarse abrasive to buff natural nails.
This is very damaging to the nails; you should use a fine polishing head from a nail drill.
Summarize:
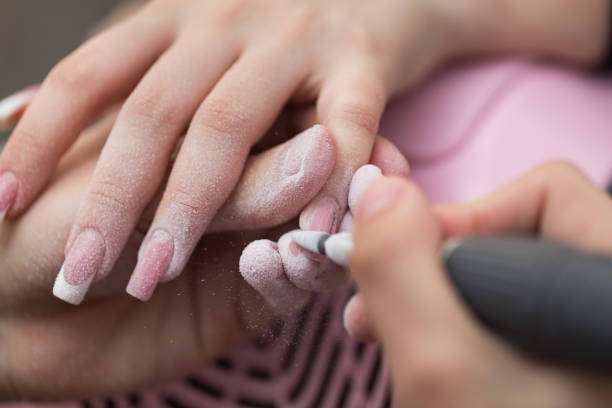
nail drill correctly, you can achieve the following pretreatment steps for cat-eye nails:
Very clean
No dead skin
Smooth nail surface
Not easy to fall off
Magnetic powder display is smoother
This is why more and more nail technicians are choosing to use nail drills for pretreatment to give cat-eye nails a “salon-level” light and shadow effect.
If you also want to improve the final look of your cat-eye nails, the most crucial step is the pre-treatment!
Looking for more nail art inspiration? Click to visit our website, where you can find it all.