Is your nail drill noisy? 5 reasons for excessive noise and vibration.

Imagine this: you’re meticulously filing a client’s nails, but your nail drill is emitting a piercing scream or an uncomfortable vibration from the handle. This not only annoys you but also directly impacts your client’s relaxing experience.
In the nail industry, nail drills are synonymous with efficiency and precision, but if they start making unusual noises, it indicates a potential malfunction. This sudden increase in nail drill noise is an emergency distress signal from the equipment. Prolonged exposure to high noise levels poses a significant threat to the hearing health of nail technicians and customer satisfaction.
5 most common nail drills Noise Diagnosis
When you hear unusual noises coming from your nail drill, you need to act like a detective, identifying the problem based on the type of noise and accompanying symptoms.
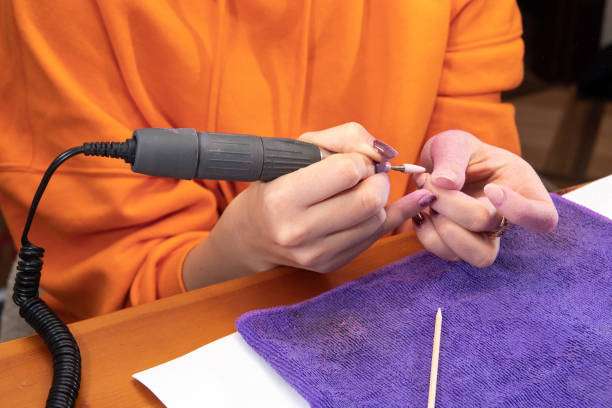
Vibration and clicking sounds: Basic errors in drill bit installation. This is the most common and easiest-to-fix nail drill problem.
When the drilling rig is running, it makes a clear clicking or shaking sound, the handle can be clearly felt to shake, and there is visible eccentric rotation at the end of the drill bit.
The root of the problem lies in a loose or improperly installed nail drill head. Either the chuck is not fully locked, or the drill bit shank diameter you are using is incompatible with your nail drill.
A piercing scream: a poor-quality or worn drill bit is protesting. Don’t let your nail drill pay for low-quality accessories.
The noise frequency is very high, and the sound is sharp, especially noticeable at high RPMs. The drill bit itself may appear heavily worn or have an uneven surface.
Inferior, excessively worn, or poorly manufactured drill bits can generate severe centrifugal force imbalances when rotating at high speeds, causing vibrations throughout the nail drill and resulting in significant noise problems. It’s time to throw away that old drill bit.
A dull “buzzing” sound: the invisible damage of nail dust. Nail dust is the number one enemy of nail equipment, silently eroding your devices. The noise is a dull rubbing or buzzing sound, and you’ll find that the machine seems less powerful than before, or even the handle gets slightly hot.
Nail dust and debris got into the motor and precision bearings of the nail drill handle, causing a surge in internal friction. This not only reduces rotational stability but also accelerates component wear, a typical precursor to drill rig failure.
A high-frequency hissing sound: the bearing is crying (urgently needs lubrication). The bearing is the “heart” of the nail drill, and it needs to be cared for.
The noise manifests as a continuous high-frequency whistling or hissing sound, while the handle heats up significantly more than before. Bearings are a core component determining the smoothness of nail drill operation. Prolonged operation, lack of nail drill lubrication, or dust intrusion can cause bearings to dry out or wear. This is one of the most difficult hardware problems to resolve regarding vibration.
Irregular “groans”: The ultimate fatigue of the motor. This is the most serious warning.
The noise is irregular, accompanied by a humming sound with a significant drop in power or intermittent stops.
This mainly occurs in older or brushed motor nail drills, usually due to worn-out carbon brushes. If it’s a brushless motor, the problem might be a faulty electronic component on the motor drive board. This typically requires professional repair or replacement of the handle altogether.
Professional DIY vibration reduction and noise reduction solutions
Don’t rush to send it for repair! For the first four problems, you can use the tools at hand to quickly fix them.
Solution 1: Quick Elimination Method – Ensure Perfect Drill Bit Alignment
If you hear a clicking sound, please stop the machine immediately and follow this SOP:
Fully unlock the chuck (twist lock/push-in). Remove the old drill bit and wipe the shank with a clean cloth to ensure no dust remains. Reinsert the drill bit, ensuring it is fully inserted, and then fully lock the chuck. Run a test at low speed. If the noise disappears, congratulations, it was just a simple operational error!
Solution 2: Deep Detoxification—Deep Cleaning of the Handle
“Detox” your nail drill:
Tools: Professional compressed air canister (or air blower), alcohol wipes, small cleaning brush.
Steps: Ensure the machine is powered off. Clean the outside of the handle and vents with a small brush. Then, briefly spray compressed air into the chuck opening and the handle’s vents. This will effectively blow out nail polish dust accumulated around the internal motor and bearings.
Solution 3: Bearing Care—The Magic of Lubricating Oil (for high-frequency hissing)
Warning: Do not attempt this operation unless you have repair experience or the machine supports user disassembly. Improper disassembly will void the warranty.
Consult your nail drill’s instruction manual. If permissible, carefully disassemble the handle to expose the bearing. Apply a very small amount of professional nail drill lubricant, then carefully reassemble. Proper lubrication can quickly eliminate the high-frequency whistling sound in a loud nail drill noise.
Solution Four: The Ultimate Solution—Upgrade Your Drill Bit Library
If none of the above methods work, and your loud noise problem is related to drill bit wear, then the solution is simple: invest in high-quality accessories. Immediately stop using any drill bit that appears worn, bent, or unbalanced.
Replace your sanding rings with brand-new, high-quality tungsten carbide or ceramic drill bits. These high-quality drill bits are better balanced during manufacturing and provide immediate vibration relief.

Integrate quiet operation into daily maintenance habits
nail drill can maximize its lifespan and keep it running quietly.
Avoid high-speed fatigue: Unless necessary, do not operate at the highest RPM for extended periods. High speeds accelerate bearing wear and are a major cause of increased noise in nail drills.
Cleanliness is paramount: After each work session, the handle of the nail drill should be cleaned externally, and the internal dust should be simply removed with an air blower.
Connection check: Regularly check the connection cable between the controller and the main unit for wear to avoid abnormal motor operation due to unstable power supply.
Summary and Reflection:
Solving the problems of excessive noise and vibration in your nail drill is not only about restoring your equipment to normal but also a crucial step in enhancing your professional image and improving customer comfort.
When was the last time you gave your nail drill a deep clean? Share your nail drill maintenance tips in the comments!
Check out our recommended quiet, low-vibration professional nail drill for an ultimate, quiet nail art experience for you and your clients!